best vada pav recipe mumbai easy is really about three things you can control in an American kitchen, a well-seasoned potato filling, a batter that fries crisp without turning oily, and a smart chutney setup that tastes like Mumbai street stalls without needing specialty gear.
If you have tried making vada pav before, the usual pain point is texture, the vada turns heavy, the pav feels dry, or everything tastes flat unless you drown it in sauce. The good news is you do not need perfect authenticity to get the “hit” people love, you need the right sequence and a couple of small checks.
One more thing before we cook, vada pav is a system, not a single recipe. You can keep it simple and still build layers, spicy garlic chutney, sweet-tangy tamarind date chutney, and a dry peanut chutney if you want the full street vibe.
What makes Mumbai vada pav taste “right” (even outside India)
People often chase one secret ingredient, but Mumbai flavor usually comes from technique and balance, heat, acid, and a little bitterness from curry leaves.
- Potato filling should be fluffy, not gluey. Over-mashing makes it dense.
- Tempering matters. Mustard seeds, curry leaves, and turmeric wake up the filling fast.
- Besan batter needs a thick coat. Too thin and the vada absorbs oil.
- Chutney strategy makes or breaks the bite, especially if your pav is not a fresh bakery roll.
According to USDA Food Safety and Inspection Service (FSIS)... deep-frying works best when oil stays hot enough to cook quickly, which also helps reduce greasy results, so your “easy” win is temperature control more than fancy equipment.
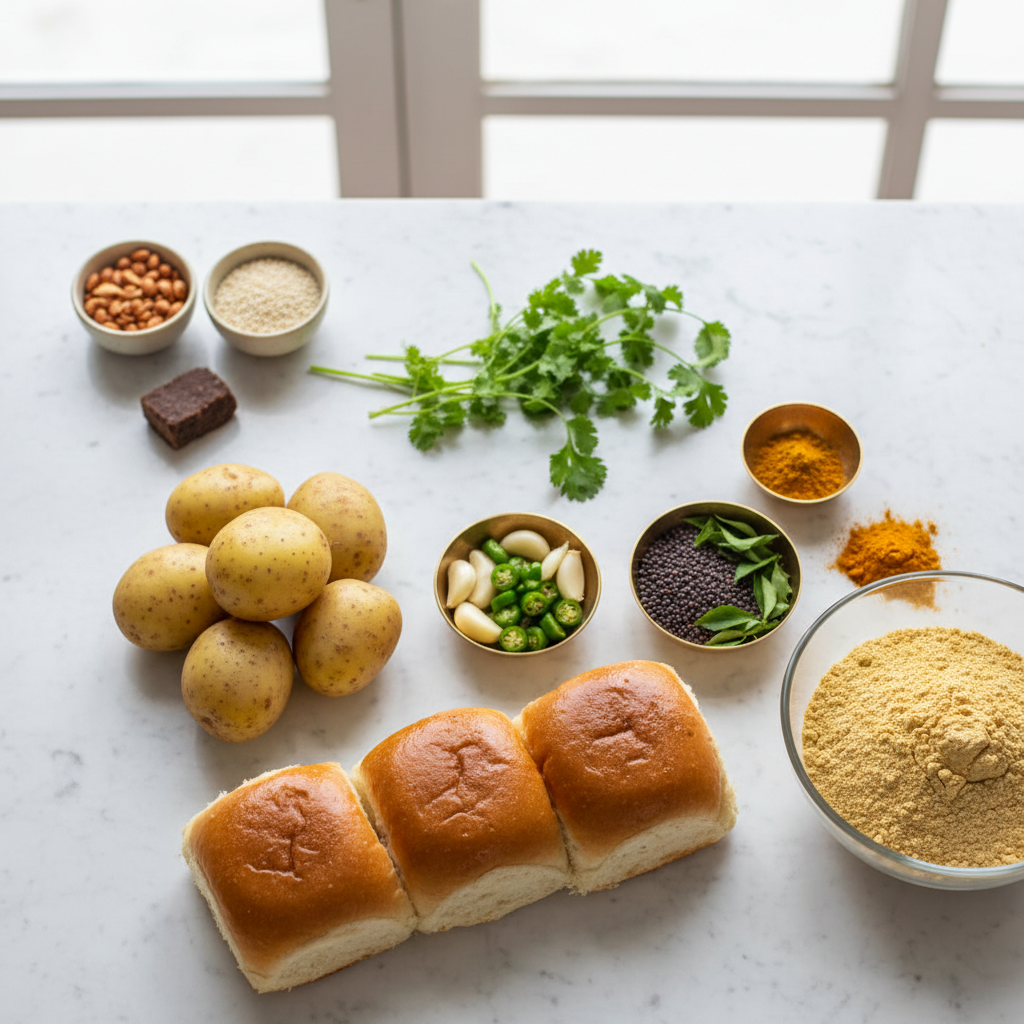
Ingredients you can reliably find in the US (with smart substitutes)
This is built for a typical US grocery run plus one optional Indian aisle stop. If you do have an Indian store nearby, curry leaves and pav make everything easier, but you can still pull this off without them.
For the potato vada filling
- 2 lb russet potatoes, peeled, cut
- 2 tbsp neutral oil
- 1 tsp mustard seeds
- 8 to 12 curry leaves, optional but recommended
- 1 tbsp ginger, finely grated
- 3 to 5 garlic cloves, finely minced
- 1 to 2 green chilies, minced
- 1 tsp turmeric
- 1 1/2 tsp salt, adjust
- 2 tbsp cilantro, chopped
- 1 tbsp lemon juice
For the besan batter
- 1 1/2 cups besan (gram flour)
- 1/2 tsp turmeric
- 3/4 tsp salt
- 1/2 tsp baking soda, optional for extra puff
- 3/4 to 1 cup water, adjust
For serving
- 8 pav rolls, or soft dinner rolls
- Neutral oil for frying
- Fried green chilies, optional
Best easy Mumbai vada pav recipe (step-by-step)
If you only follow one rule, keep each part simple and do not rush the frying. That is how the best vada pav recipe mumbai easy turns out crisp, light, and punchy.
1) Cook and prep the potatoes
Boil potatoes in salted water until a knife slides in easily, drain well, then let them steam-dry for a few minutes. Mash lightly, you want small lumps rather than a puree.
2) Temper the spices and finish the filling
Heat oil in a skillet, add mustard seeds, when they pop add curry leaves, ginger, garlic, and green chilies. Stir 30 to 45 seconds, then add turmeric.
Add mashed potatoes and salt, mix until the yellow color looks even. Turn off heat, fold in cilantro and lemon juice. Cool until warm, then shape into 8 to 10 tight balls.
3) Make a thick besan batter
Whisk besan, salt, turmeric, and baking soda. Add water gradually until batter falls in a thick ribbon, it should coat the back of a spoon and not run off instantly.
- If batter looks thin, add 1 to 2 tbsp besan.
- If batter looks stiff, add water by teaspoons.
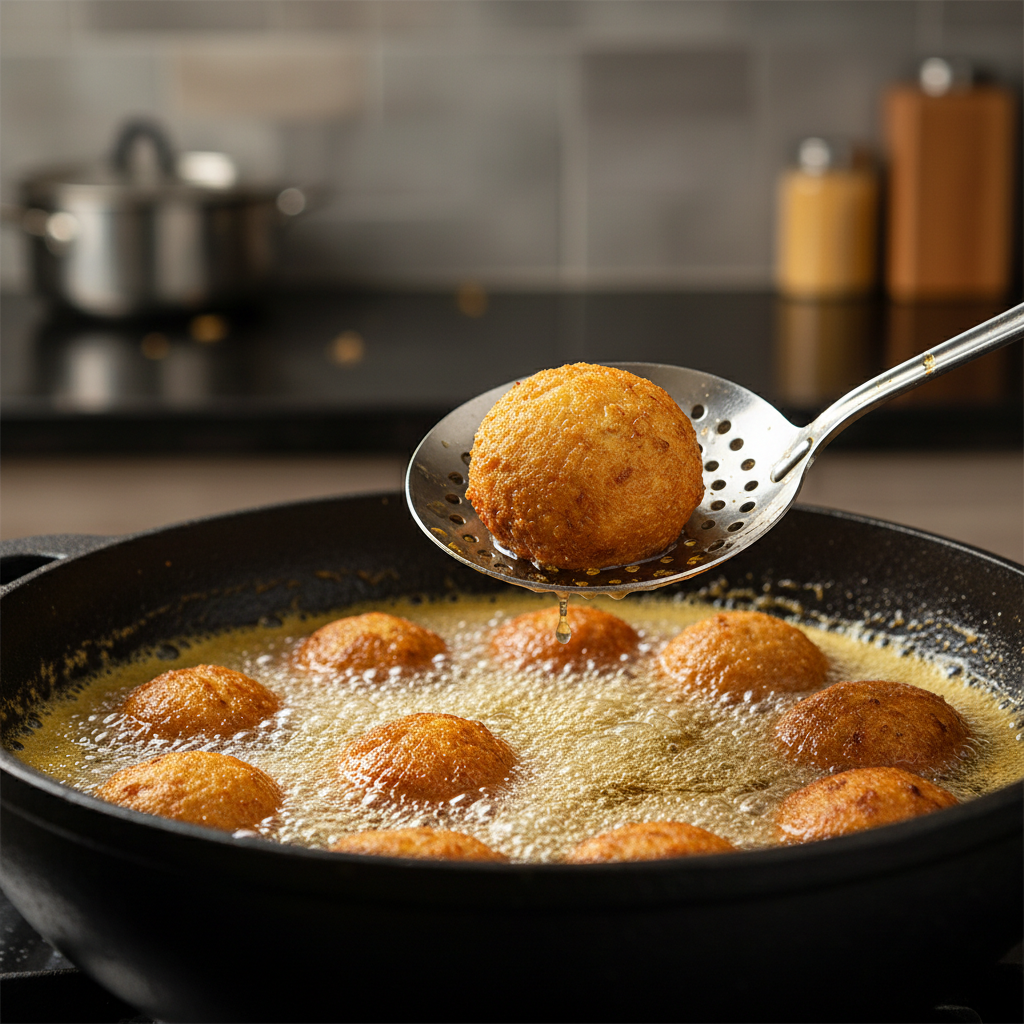
4) Fry the vadas
Heat oil in a deep pot to about 350–360°F if you have a thermometer. Without one, drop a tiny bit of batter, it should rise quickly and bubble steadily.
Dip each potato ball in batter, coat fully, then slide into oil. Fry in batches, do not crowd. Turn occasionally until deep golden, 5 to 7 minutes depending on size.
Drain on a rack or paper, salt lightly while hot if you like.
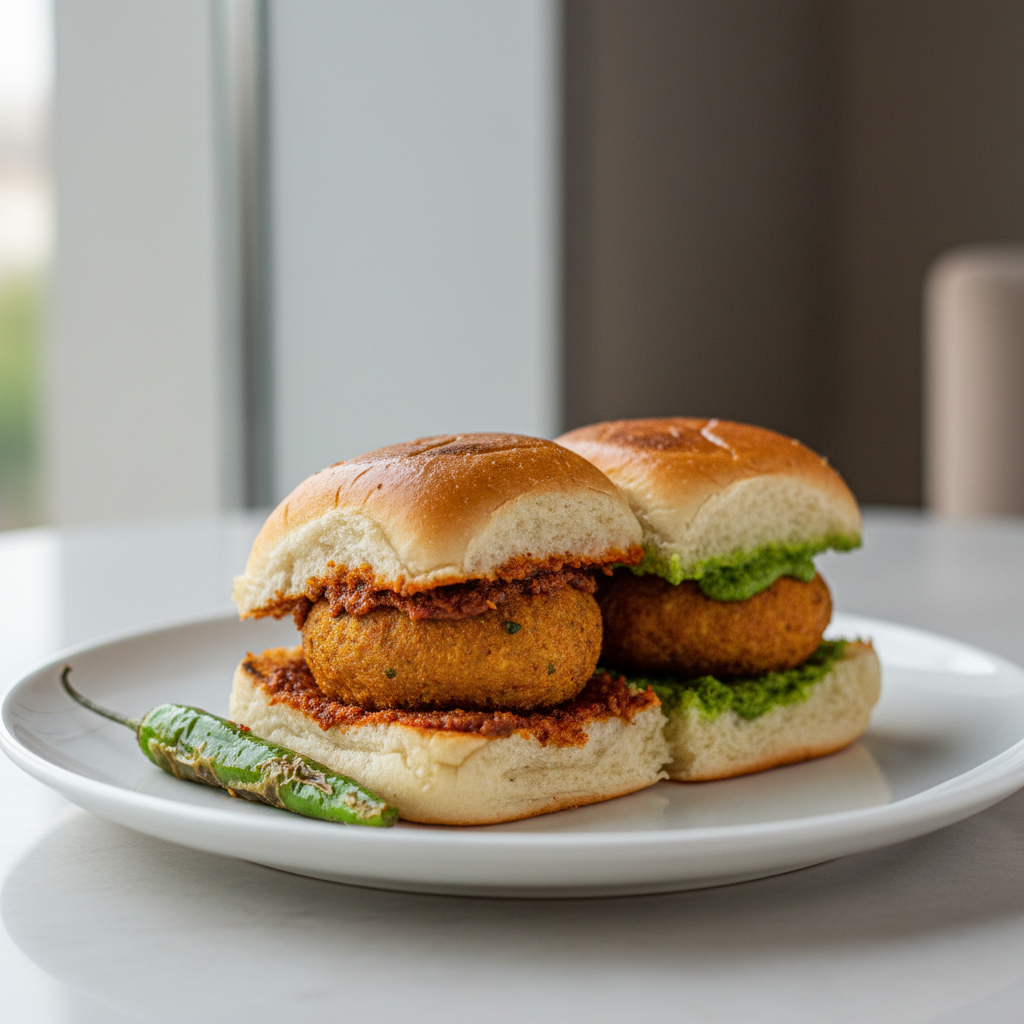
5) Warm the pav and assemble
Split pav or rolls, toast quickly on a dry pan or with a small swipe of butter. Spread chutney, add hot vada, press gently, serve immediately.
Chutney options that keep it “easy” but still street-style
You can do one chutney and still be happy, but most people fall in love with vada pav when the spicy and sweet notes show up together.
Option A: Quick garlic chutney (spicy)
- 6 garlic cloves
- 2 tbsp unsweetened coconut, shredded, optional
- 2 tbsp roasted peanuts
- 1 to 2 tbsp Kashmiri chili powder or mild paprika + cayenne to taste
- Salt
Pulse to a coarse powder. If you want it spreadable, add 1 to 2 tsp oil.
Option B: Tamarind-date chutney (sweet-tangy)
- 1/3 cup tamarind concentrate or paste diluted per label
- 1/2 cup pitted dates
- 1/2 tsp roasted cumin
- Salt, pinch
Simmer with a splash of water until dates soften, blend, then adjust thickness. Store chilled.
Option C: Peanut-sesame dry chutney (nutty)
- 1/3 cup roasted peanuts
- 2 tbsp sesame seeds, toasted
- 1 tbsp chili powder
- Salt
Pulse to a sandy mix and keep dry, it is forgiving and fast.
Troubleshooting: quick fixes when texture or flavor feels off
This is where most “easy recipes” quietly fail. Use the checks below before you blame your ingredients.
- Vadas turn oily: oil likely too cool, batter too thin, or pot overcrowded. Raise heat and fry fewer at a time.
- Batter slides off: potato balls too wet or too hot. Cool the filling and pat hands dry while shaping.
- Vadas taste bland: filling needs more salt and acid. Lemon juice helps more than extra chili.
- Pav feels dry: quick toast plus chutney on both sides helps, also wrap rolls in a towel after warming.
Timing plan + shopping table (so it does not feel like a project)
If you are cooking for friends, the stress point is coordination. Make chutneys earlier, fry vadas near serving time, and keep rolls warm.
| Task | When to do it | Why it helps |
|---|---|---|
| Make dry garlic or peanut chutney | Up to 3 days ahead | Flavor settles, assembly becomes fast |
| Make tamarind-date chutney | 1 to 5 days ahead | Easy to adjust sweetness and thickness |
| Cook and season potato filling | Same day, 1 to 4 hours ahead | Cooling makes shaping cleaner |
| Fry vadas | Right before serving | Crisp texture stays crisp |
| Toast pav | Last 5 minutes | Soft inside, warm outside |
Practical safety notes for deep-frying at home
Hot oil is manageable, but it is not forgiving. Keep a lid nearby, do not add wet food, and avoid filling the pot more than halfway. If you have respiratory sensitivity, frying fumes can be irritating, good ventilation helps, and if you have health concerns you may want to consult a professional.
According to National Fire Protection Association (NFPA)... unattended cooking is a common cause of kitchen fires, so stay present during frying and keep kids and pets away from the stove zone.
Key takeaways (what actually gets you street-style results)
- Thick batter + hot oil creates a crisp shell without grease.
- Light mash keeps the center fluffy, not pasty.
- Chutney balance makes even dinner rolls taste closer to pav.
- Fry close to serving, vada pav is best when hot and fresh.
Conclusion: make it easy, then make it yours
The best vada pav recipe mumbai easy is the one you can repeat without overthinking, a dependable potato filling, a batter you can read by texture, and one chutney that matches your heat tolerance. Start with the base method, then add the extra chutney layer when you feel comfortable.
If you cook it this week, pick one upgrade for next time, curry leaves, a better pav roll, or a garlic chutney you keep ready in the pantry, that is usually how vada pav turns from “fun experiment” into a real craving food.